


AFTER A TIME DEVELOPING OUR QUAD, WE FINALLY HAVE A VIDEO PLATFORM CAPABLE OF HANDLING AERIAL VIDEO WITH QUALITY AND AT A SURPRISINGLY LOW COSTA
ICARUS IV
VIDEO PLATFORM SEMI PROFESSIONAL
I hope that with these tips you can get your quad fly reasonably stable and allows you to spend time a lot of fun and why not make those spectacular aerial videos always wanted to do, I encourage all a matter of patience, perseverance and not much money the result is certainly worth off.
NB Do not forget to consult and respect the latest legislation in force regarding the use of drones in your country
Legal:
All information transmitted in this article is for informational purposes only without warranty of any kind and for the sole purpose of helping others achieve achieve a particular purpose. Not guarantee any specific outcome or endorse any particular brand, all operations should be made respecting the personal safety measures that the laws of each country requires.
This video shows how to configure the gimbal HK for Tarot, here are the links to the software:
links:
http://www.hobbyking.com/hobbyking/st...
http://www.ftdichip.com/Drivers/VCP.htm
This video shows how to do to move the camera and get a view zenith, the camera continues to be stabilized in any position that put
First tests to check the operation of the gimbal of Tarot, besides moving the camera to a position overhead
Interesting video showing a method of balancing our quad engines, adapting a laser pointer to the engine bay arm
Views of el Saler (old engines)
The Nou Mestalla stadium (old engines)
Wind Turbines (old engines)
Port Saplaya, with strong wind (old engines)
The Port of Valencia (old engines)
The Roman theater of Sagunto (old engines)
Testing new engines, increased autonomy to 8 minutes!
Intempo Towers in Benidorm first long flight with the new engines
Blast furnace
RTVV at Burjasso
Cap Negret , La Olla, Altea, Alicante (Spain)
Flight near the beach, Altea Hills, Alicante (Spain)
Landing in a rock at sea
REQUIREMENTS
If you followed the previous chapters here, I think we already have the expertise to build our quadcopter for semi professional aerial filming, following these premises:
1) Economic
2) Lightweight 975g (without battery)
3) Easy to transport
4) Simple to maintain program and operate
5) Stable with poor condition (wind)
6) Easy to repair and finding cheap and affordable parts
7) Autonomy about 7 minutes
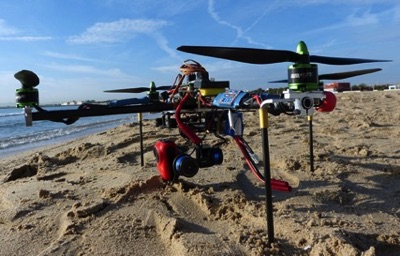
ESSENTIAL ELEMENTS FOR QUADCOPTER ICARUS IV VIDEO PLATFORM
A) Aerial Platform
1) Chassis Carbon fiber frame HK Talon
2) HK KK2 controller with the latest firmware 1.6
3) HK 30A ESC UBEC flashed with the firmware from Simonk
4) HK 6 channel receiver.
5) Combination of engines and propellers Multicopter Multistar Turnigy 2213 935 Kv motor with propeller 1045 (combo)
6) LIPO Battery 2200 mAh and discharge 30c
B) Video System
1) Tarot System 2-D gimbal for independent video-stabilization
2) HK Controller for low cost gimbal Tarot
3) Installing firmware on the controller Martinez HK
4) Camara liquid Image EGO, low cost, very light and GoPro similar quality
C) Changes to make
1) Adding three carbon fiber rods for make a tripod for the quad
2) Strengthen Talon chassis structure at some points with aluminum bar
3 Make parts for installe engines to the chassis Talon
4) Build a support piece to camera gimbal Tarot to adapt the EGO camera and sensor stability of the HK gimbal board.
EXPLANATORY VIDEOS AND PHOTOS
Various videos and pictures try to explain some of the points outlined above, only if it is necessary to show some detail in particular, the rest is mounting and tuning of standard quad.
Talon chassis reinforcement, also add small aluminum cylinders where motors are subjected to squeeze with more force without damaging the carbon fiber
With two small pieces of aluminum and greater separation using the motor (19 mm) to get fasten heel chassis, here we see the two pieces with conical screws that are flush, placed in the engine
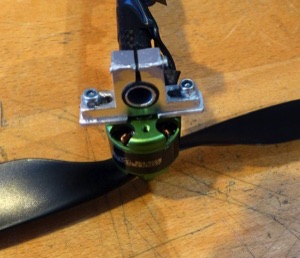
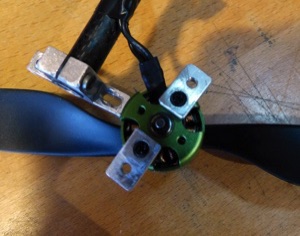
Here is the motor attached to the chassis, using those two little pieces, the separation is sufficient for the motor to rotate freely and does not touch the chassis.
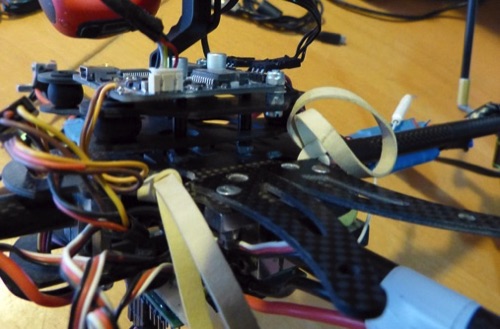
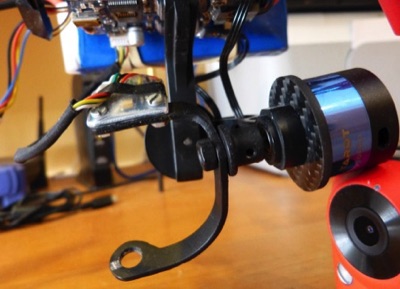
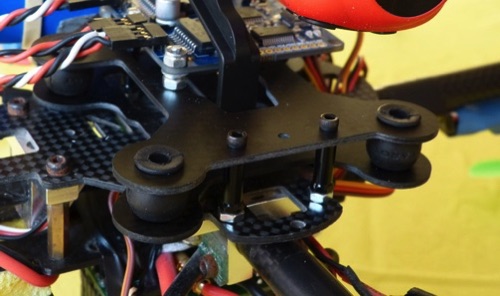
In this picture we see the Tarot gimbal mounting to HK heel chassis on the front, should be placed in the most advanced, to ensure the correct balance of mass
Here is how the gimbal is fixed to the chassis of Talon Tarot in the back, also the cleat LIPO battery, using two chassis legs Talon remaining two tires and LIPO battery look at this place that ensures correct weight distribution in our quad
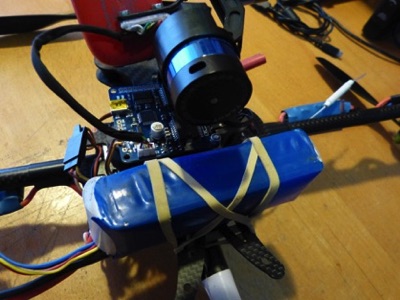
In this picture we see the 2200 mAh lipo battery 30c mounted in place, easy to install, very firm, allowing the assembly of larger batteries and larger if desired.
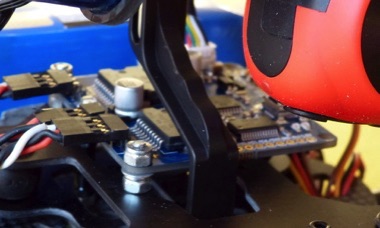
The Tarot gimbal controller board is fixed at HK gimbal using only two screws with spacers as pictured
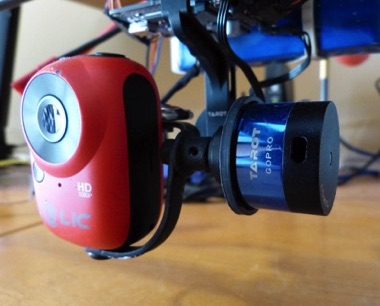
Adjust the liquid image camera gimbal Tarot Ego required to make this piece of aluminum, are two parts, the first which is simply a motor propeller mounting with screws, and a piece that allows you to place the camera using a camera screw Standard and small plate where the sensor is attached plaque stability Tarot gimbal HK
This image shows the part to use a camera from Liquid Image EGO with Tarot gimbal is relatively simple to make and very light weight.
On the back plate is screwed to the sensors on the controller that is in this position.
AERIAL VIDEOS MADE THIS QUAD AND TAROT GIMBAL
The last of the quad configuration is as follows:
1) HK Talon carbon frame
2) KK2 FCB 1.6 firmware
3) Turnigy 2200mAh 3S 30C Lipo Pack
4) Turnigy Multistar Multicopter Motor 2213 935 Kv with 1045 propeller (combo)
5) HK 30 A UBEC ESC flashed with SimonK
6) Tarot 2 D Brushless Gimbal with HK controller board (Martinez firmware)
7) Liquid Image Ego Camera
Low cost quad, weight 975 gr with brushless gimbal and camera.